From the countless posts I’ve seen from #100DaysToOffload, I finally decided to partake as well.
Well, even though I did get NetlifyCMS up and running to post online, I’m still writing this post on a Vim terminal.
Over the week, I’ve been playing around with self-hosting an instance of Pleroma on one of my spare Rasberry Pis with YunoHost. I’ll probably make a separate post on this when I get it to a much more stable state.
After testing out the web server locally by IP address, it was time to associate it with a domain name and get a certificate from Let’s Encrypt.
I currently use NameCheap for my domain names, and I picked up an acceptable one for $2. I added a CNAME to redirect to a domain that my router already handles by DDNS, and it redirected to my pi!
All is good, right? Not quite.
To get rid of the ugly warning pages while accessing HTTPS, I tried clicking the 1 click install of a Let’s Encypt certificate. All I get is a fail message. After some trial and error installing it from the command line, I realized that the verification was failing due to recognizing a different IP address than my network. What is this mysterious IP address?
After a bit of detective work, I discovered the IP actually belonged to NameCheap! Even though I placed a CNAME redirect to my DDNS domain, the IP resolved to their server before redirecting to my IP.
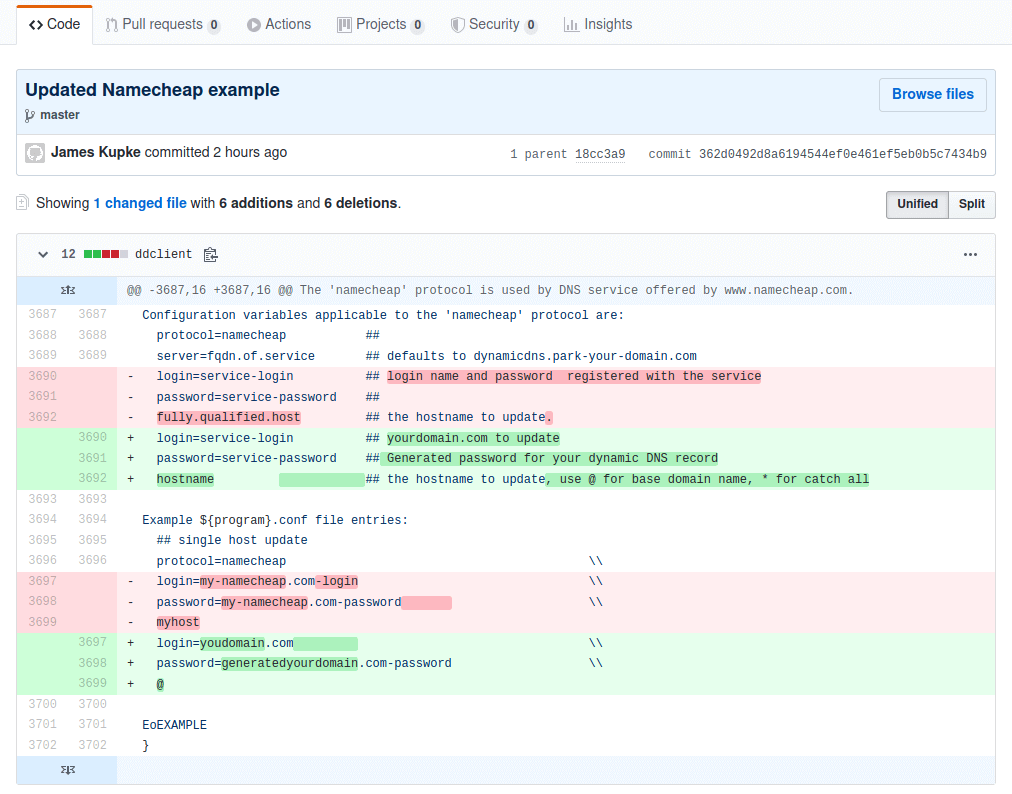
At this point, I decided to implement a DDNS client on my pi to directly talk to NameCheap, and found DDclient. After reading through their documentation and sample files, I installed and configured it on my pi, but kept running into authentication issues updating my IP. After finding NameCheap’s Knowledgebase Article, I found that the login name and domain entries were different than the DDclient documentation. A few edits, and voila! Up and running.
Apparently NameCheap is not as popular as the other DDNS providers that DDclient uses, as it took quite a bit of digging around to find the right answer. Taking a look at DDclient’s source code, the comment section describing a sample configuration for NameCheap was pretty easy to find within the perl script. I could fix this myself!
I have a rudimentary understanding of Git from playing around locally on my PC, and I’ve heard the term Pull Request thrown around quite frequently to take in changes. How hard could this be? Turns out, not too terrible.
I’ve been only using GitLab before, so I had to make an account over at GitHub. They offer 2 ways to submit a pull request:
- Create a branch, and then submit your branch for a pull request. This requires write access, which would be too much to ask for a one off request from a stranger.
- Fork the project, and submit the fork for pull request.

Initially I didn’t see the tiny magic button on the top right corner and cloned the existing repo trying to figure out how to fork. After finding the error of my ways, simply pressing the fork button automates cloning the repository over to my account and links it up. Nice!

I was familiar at least with cloning repositories and pushing my own changes back upstream. After pushing, I created a new pull request and selected my fork from master to compare against. It’s now up to the maintainers to see if they liked the changes. Considering it’s only comments and not functionality, it should be pretty quick to review when they get around to it.
I’m hoping it gets approved!